


In this guide, we are going to install the latest version of Fedora – Fedora 34 workstation with screenshots. This guide will go through the step by step process involved in running Fedora 34.
Fedora is a free and open source Linux distribution developed by the community-supported Fedora Project which is sponsored primarily by Red Hat. Fedora comes in several Desktop and Server flavors.
Using a new operating system can be a lot of fun. But it often becomes confusing when we first use it, especially for new users who are not very familiar with computer systems. For those of you who are using Fedora Linux for the first time and have successfully installed Fedora 34 Workstation, this article can be an initial guide. I’m sure that you want to feel more at home with your new fresh Fedora Linux system. These are several things to do after installing your Fedora 34 Workstation.This is quick guide tour how to install Fedora 34 Workstation / Desktop on real PC. First create your bootable USB flash drive .
REQUIREMENTS TO INSTALL FEDORA 34
The recommended requirements for installing Fedora are as follows:
1 GHz or faster Processor
1 GB of RAM
10 GB of hard disk space
CREATE A BOOTABLE FEDORA DRIVE
Step 1: You can download the etcher installation package from Etcher official website.

Step 2: Please download the Fedora OS 34 image file. Fedora OS download page.

Step 3: Insert the USB flash drive into your computer.
Step 4: Double-click on the balenaEtcher download file to run the app. Press Flash from file to select the downloaded Fedora OS 34 ISO file on your computer.

Step 5: Press Select target and choose the correct USB flash drive from the list.

Step 6: Press Flash! to begin writing Fedora OS to the USB flash drive.

INSTALL FEDORA 34 WORKSTATION STEP BY STEP
Step 1: Make sure that the written USB Install Drive is plugged into your computer.
Step 2: Switch the computer on. Immediately upon startup, press the indicated key repeatedly to open the Boot Device Menu. press F9, F10, F12 key dependent on the model of your PC. From the Boot Device Menu, select the option with "YOUR USB" to boot from the Install Drive.

Step 3: When you boot from the installation media, you will be given an option to start the Fedora Workstation Live or test the media. If you do nothing it will default to starting the Fedora Workstsation Live.

Step 4: When you click Enter, the disk will be check to ensure everything is healthy before proceeding with the installation

Step 5: Select Install to Hard Drive at the Fedora startup screen.

Step 6: Choose your language and select Continue.

Step 7: Select Time & Date on the Installation Summary screen.

Step 8: Choose your time zone on the map and then select Done to return to the Installation Summary screen.

Step 9: Select Installation Destination.

Step 10: Choose your hard drive under Local Standard Disk and select Automatic under Storage Configuration. Then select Done to return to the Installation Summary screen. Please note that all data on this disk will be erased.

Step 11: If your hard drive has another operating system installed, you may receive a message stating that there isn't enough free space. Select Reclaim Space to shrink or delete existing hard drive partitions. Deleting hard drive partitions removes any other operating systems you have installed on the computer.

Step 12: Select Delete All then Reclaim Space.


Step 14: Installation in progress, please wait a few minutes. It will install the software, Install bootloaders, Configure system and Configure Initramfs.

Step 15: Select Finish Installation when the process is complete.

Then it's over! Well done ! You have successfully completed your installation.
Step 16: If your computer doesn't automatically restart, select the down-arrow in the top-right corner of the desktop and select the Power Off/ Log Out.

Step 17: Select Restart.

Step 18: Remove the USB drive as your computer reboots.
Step 19: After restarting you should end up on the following screen. It is a session of the GNOME environment that is launched only to create the first user. Press Start Setup.

Step 20: Connect to Wifi or to Ethernet Cable.

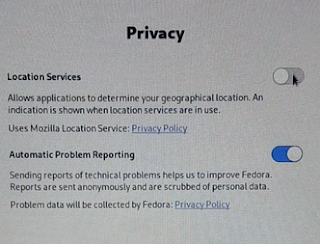
Step 21: This configuration panel is used to activate geolocation for certain services or to send information to the Fedora project in the event of an application crash. You can read the privacy policies of each service before agreeing. Disabling them does not have a big impact on the use of your computer. Don't feel pressured to activate them.
Step 22: GNOME offers the integration of online accounts with some providers like Google, Microsoft, Facebook or Nextcloud. This allows you to synchronize contacts, calendars or access remote files of these services directly from GNOME applications. Again, nothing essential. You can configure them on this panel if you wish. Otherwise use the Skip button to go to the next step.

Step 23: Finally Set Up an Admin user account by supplying the Full Name and Username.

Step 24: Then set up a strong password for the user.

Step 25: Once all those steps are complete, you will get this final step informing you that the set up is all done and you can now use the system.

Congratulation! You have successfully installed Fedora OS 34 on your system. This is the end of our guide on how to install Fedora OS 34 Step by Step with ScreenShots.
Maybe you think that you have installed the most recent version of Fedora 34 Workstation, so your Fedora Linux should be up to date. But you still have to make sure that your Fedora Linux has all the updated packages. Because in every new release of an operating system, usually there are still many things that continue to be improved. You can use the terminal or GNOME software to run the update.
If you want to update via the terminal, then you just have to open a terminal and type the following command.
sudo dnf update
VIDEO TUTORIAL - INSTALLATION GUIDE
DOWNLOAD FILES
Click on below button to start Download the files from the download links.

We hope you enjoy my Website content as much as we enjoy offering them to you. If you have any questions or comments, please don't hesitate to let comment below.
Click on below button to start Download the files from the download links.
balenaEtcher-Portable-1.5.122
Fedora-Workstation-Live-x86_64-34-1.2.iso
DISCLAIMER
All videos on my Website and YouTube channel are for Educational purpose only to help people Fix errors and download and install software... for free. Anyone using these videos for any illegal or unlawful purpose will be solely responsible for his/her activity.
All videos on my Website and YouTube channel are for Educational purpose only to help people Fix errors and download and install software... for free. Anyone using these videos for any illegal or unlawful purpose will be solely responsible for his/her activity.


0 Comments: