


Void Linux is a Linux distribution that aims to provide a powerful, yet easy-to-approach, operating system. It is designed to be both simple and stable and achieves that through the use of runit and its own lightweight package manager.
Similar to Arch Linux, Void Linux follows a rolling release model and a “user-centric” approach to operating system usage. This means Void Linux is constantly updated but is also bare-bones when installed. It makes Void Linux appealing for power users who want to have a flexible operating system that they can fully understand and tinker with.
DOWNLOAD VOID LINUX AND ETCHER TOOL
You need an ISO image of Void Linux. You can Download it from the official Void Linux download page. You also need a 8GB USB drive which will be used as a bootable installation medium.

To install Void Linux, you need to write your downloaded ISO to a USB stick to create the installation media. This is not the same as copying the ISO, and requires some bespoke software.
For this tutorial, we’ll use balenaEtcher, as it runs on Linux, Windows and Mac OS. Choose the version that corresponds to your current operating system, download and install the tool.

CREATE A BOOTABLE USB STICK
Step 1: Insert the USB flash drive into your computer.
Step 2: Double-click on the balenaEtcher download file to run the app. Press Flash from file to select the downloaded Void Linux ISO file on your computer.

Step 3: Press Select target and choose the correct USB flash drive from the list.

Step 4: Press Flash! to begin writing Void Linux to the USB flash drive.
For this tutorial, we’ll use balenaEtcher, as it runs on Linux, Windows and Mac OS. Choose the version that corresponds to your current operating system, download and install the tool.
CREATE A BOOTABLE USB STICK
Step 1: Insert the USB flash drive into your computer.
Step 2: Double-click on the balenaEtcher download file to run the app. Press Flash from file to select the downloaded Void Linux ISO file on your computer.
Step 4: Press Flash! to begin writing Void Linux to the USB flash drive.

After a few minutes, the USB flash drive will be ready for booting into Void Linux.
INSTALLATION OF VOID LINUX
Step 1: Insert the USB flash drive into your computer.
Step 2: While the system would restart and initialize start pressing F9 (or Del or F10 or F12 or Esc) to display Boot Menu. The key could be different on different make and model, try other keys as per Make and Model of your machine.
Step 3: From the Boot Menu, select Flash Drive as Boot Device and Hit Enter. It may be at different serial number in different systems. Wait for the system to Boot from the Flash Drive.

Step 4: Once it boots, you will be greeted by the Void Linux boot menu. From here, choose the first option. This will then load you into the live installer.

Step 5: Once the live image has booted, log in as root with password voidlinux.

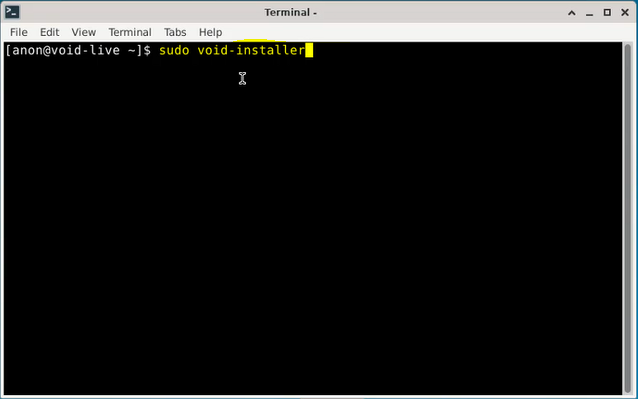
Step 6: On the live image open terminal emulator run:
sudo void-installer
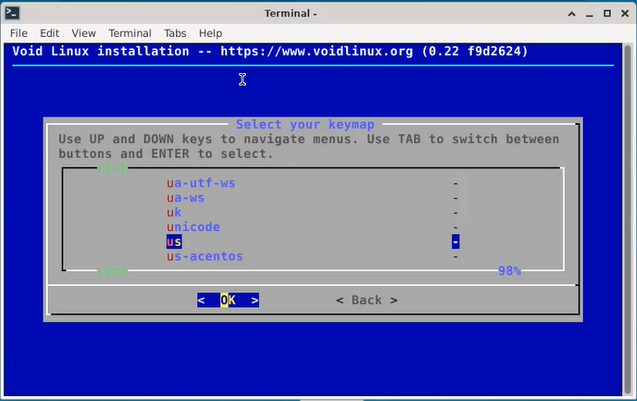
Step 7: The main menu of the installation wizard highlights all of the steps that you need to do. We are starting with the Keyboard and making our way down.

Step 8: Select the keymap for your keyboard, standard "qwerty" keyboards will generally use the us keymap.
Step 9: Select Set up the network.

Step 10: Select your primary network interface.

Step 11: Select Yes and Press Enter.

Step 12: Press Enter.

Step 13: The next step is to select where the installer will get its packages to install.

Step 14: To install packages provided on the install image, select Local.

Step 15: For this next step, you will need to provide a hostname for your machine.

Step 16: Set the machine hostname.

Step 17: Select your set system time zone.

Step 18: For the timezone step, pick the closest location to you, as this will determine your system clock.


Step 19: For the next step, provide a root password for the machine.

Step 20: Enter and confirm your root password for the new installation. The password will not be shown on screen.

Step 21: Setting Up the User Account.

Step 22: Choose a primary login name.

Step 23: Choose a descriptive name for that login.

Step 24: Then enter and confirm the password for the new user.

Step 25: In the next step, press space then Enter.

Step 26: Setting Up the Bootloader.

Step 27: Select the disk to install a bootloader on when Void is installed.

Step 28: You will also be asked whether or not you want a graphical terminal for the GRUB menu.

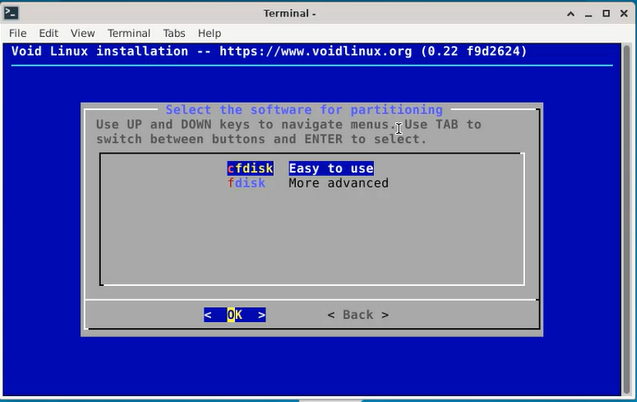
Step 29: Creating the Partitions.

Step 30: Next, you will need to select your disks.

Step 31: Void does not provide a preset partition scheme, so you will need to create your partitions manually with cfdisk.
Step 32: You will be prompted with a list of disks. try to remove all the partition then create 2 partitions, first one for swap partition 2GB and second partition for rest of the size.

Step 33: Creating the File systems.

Step 34: Select the biggest partition size.

Step 35: Select ext4 Linux ext4 (journal).

Step 36: Type and / as its mountpoint.

Step 37: Confirm with pressing on Yes.

Step 38: Choose Done and press Enter.

Step 39: Starting the Installation.

Step 40: Select Yes.

Step 41: The installer will create all the filesystems selected, and install the base system packages. It will then generate an initramfs and install a GRUB2 bootloader to the bootable partition.

Step 42: Reboot the system by pressing Enter.

Step 43: On Grub Boot Menu choose first option Void GNU/Linux.

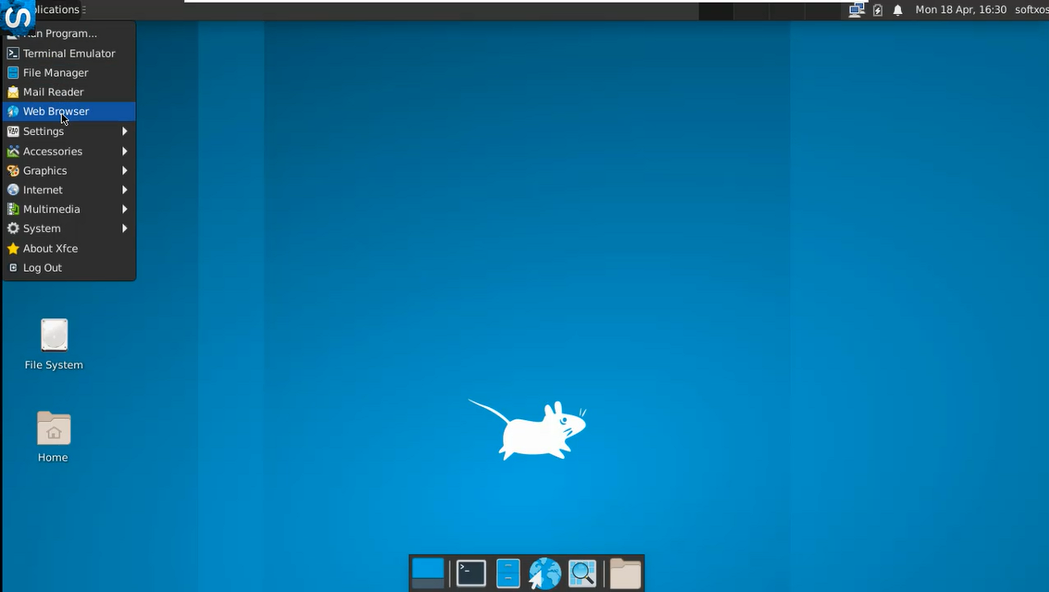
Step 44: Once your system has been rebooted after the installation then you will get the beneath login screen, enter the password that you have set during installation.

Now Enjoy your newly installed Operating system.
WHAT TO DO AFTER INSTALLING VOID LINUX
Update Void Linux using command line in the Terminal
All you have to do is to fire up the Terminal emulator app or another terminal emulator of your choice.
Update Void Linux using command line in the Terminal
All you have to do is to fire up the Terminal emulator app or another terminal emulator of your choice.
Let’s try and update the system using:
sudo xbps-install -Su
sudo xbps-install -Su
Followed by your password.

Pay attention to the progress of the Terminal and enter Y when needed.

In some cases, you may need to reboot your Void Linux system for the installed updates to work properly.
VIDEO TUTORIAL - INSTALLATION GUIDE
DOWNLOAD FILES
Click on below button to start Download the files from the download links.

balenaEtcher-Portable-1.5.122
void-live-x86_64-musl-20210930-xfce.iso
We hope you enjoy my Website content as much as we enjoy offering them to you. If you have any questions or comments, please don't hesitate to let comment below.
DISCLAIMER
All videos on my Website and YouTube channel are for Educational purpose only to help people Fix errors and download and install software... for free. Anyone using these videos for any illegal or unlawful purpose will be solely responsible for his/her activity.


0 Comments: